Showing posts with label Gear. Show all posts

Thursday, December 25, 2014

My Post Hike Gear Review (Pt. 3 - Misc)

(My complete gear list)

Trekking Poles - Gossamer Gear LT4s/Leki Quantum

I started my hike with a pair of Gossamer Gear LT4s trekking poles. They are made of carbon fiber, and are very light indeed. I was worried that the lack of shock absorbing will bother me, but I quickly got used to them, and they've been very useful on the trail.
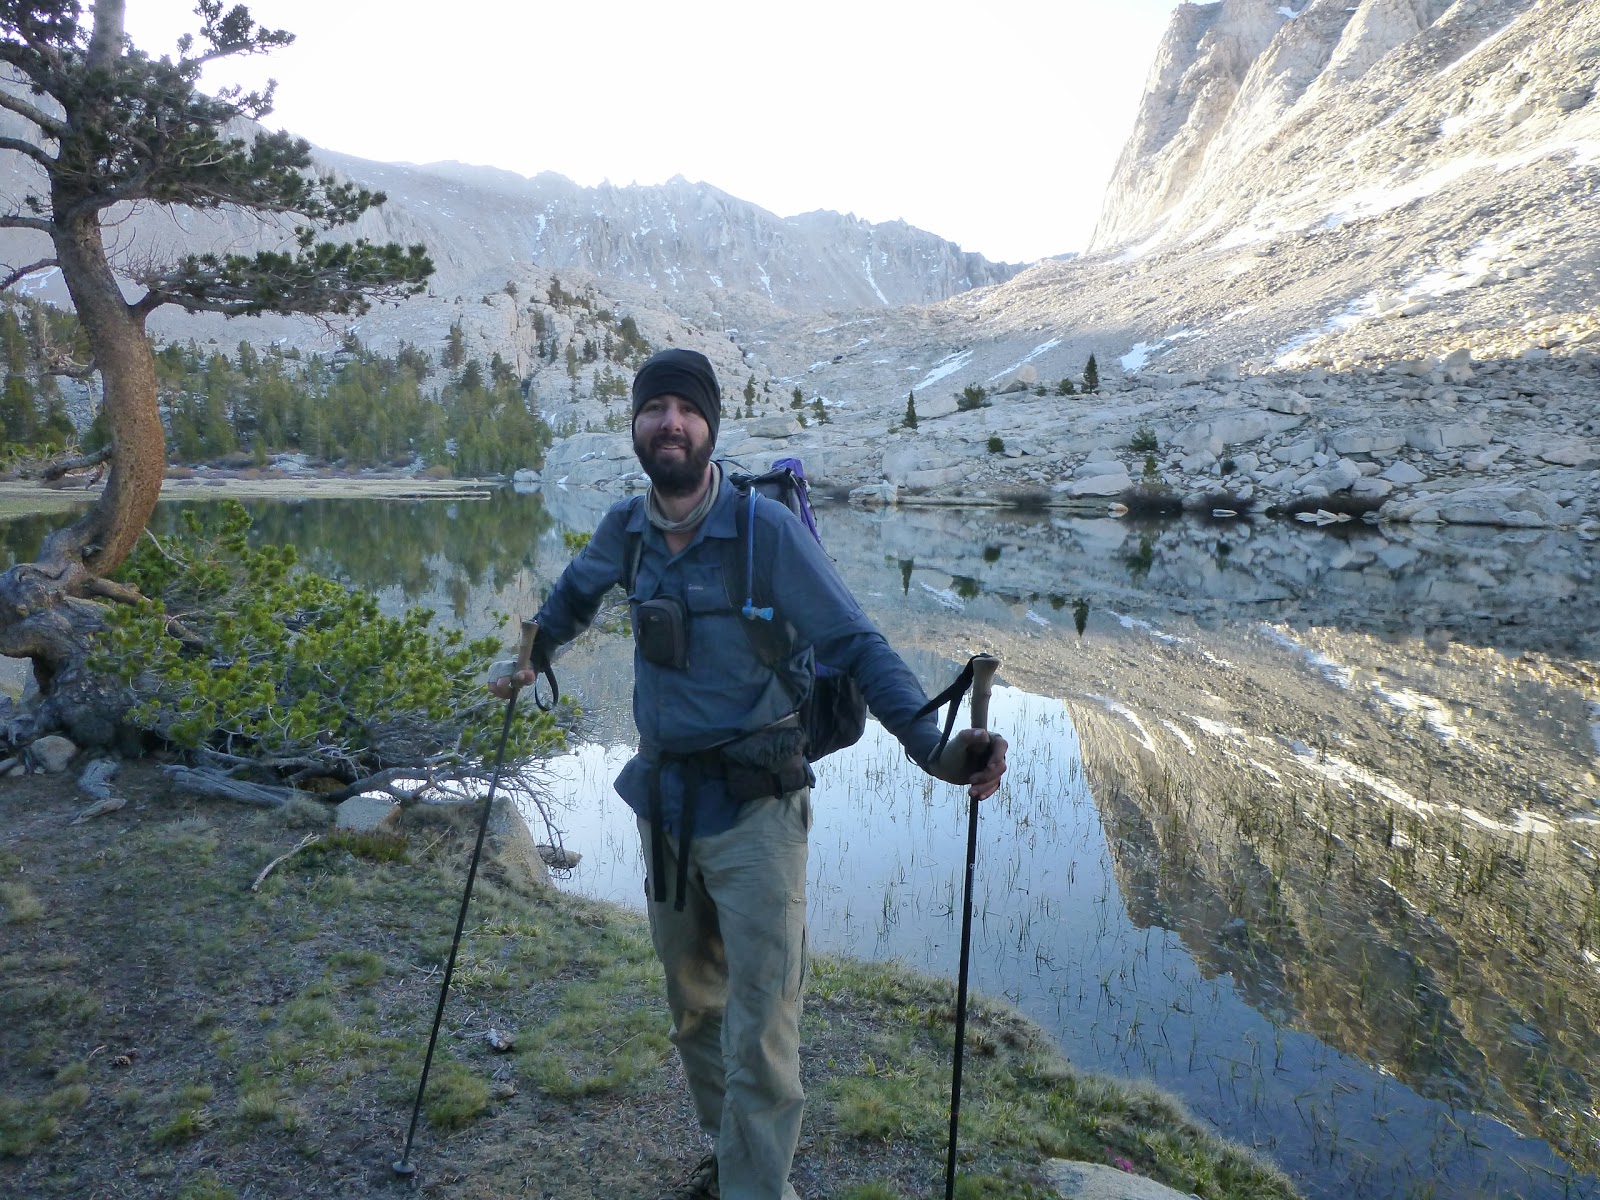
They did work, for a good 2/3 of the trail
The biggest problem I had with the poles was theie locking mechanism. It seems simple enough, and it almost never failed on me while hiking, but whenever I wanted to adjust the length (every evening at camp, to extend them so that my tent would be wide enough, and every morning, to retract them back to hiking length), I had to fight with the mechanism, twisting and turning, pushing and pulling. It was a real pain in the ass, and I finally gave up and ordered 4 tent stakes, so I could set up my tent without fiddling with the poles. That solved that problem, but it was still annoying.
Another problem I had with them - the tips are wearing down really fast. I contacted GG support when I was in Lake Isabella (Mile 561) and ordered tips to Lone Pine (Mile 788), where I replaced one tip. I replaced a second tip in Quincy (Mile 1269), and another in Ashland (Mile 1726). All the while, Idan was still using the original tips he used from the start, and they were just starting to show some wear.
Coming out of Lone Pine, I managed to snap one pole's lower section while post holing. Admittedly, while stumbling through the snow I stepped on the pole. But it did snap easily. I had to order a replacement to Mammoth Lakes (Mile 906). Coming out of Ashland, I just had a little stumble over a root on the trail (I didn't even fall to the ground), and again I snapped a pole. I was thinking of buying another section (GG offer no warranty on the poles), but then I snapped the second pole on the following day (This time I did end up flat on the ground). Luckily - I had one snapped lower section, and one snapped upper section. So together I still had a full pole to carry me all the way to Cascade Locks (Mile 2155). Coming down into Cascade Locks on the Eagle Creek (steep) alternate, I finally snapped my pole again. No GG poles for me in Washington!
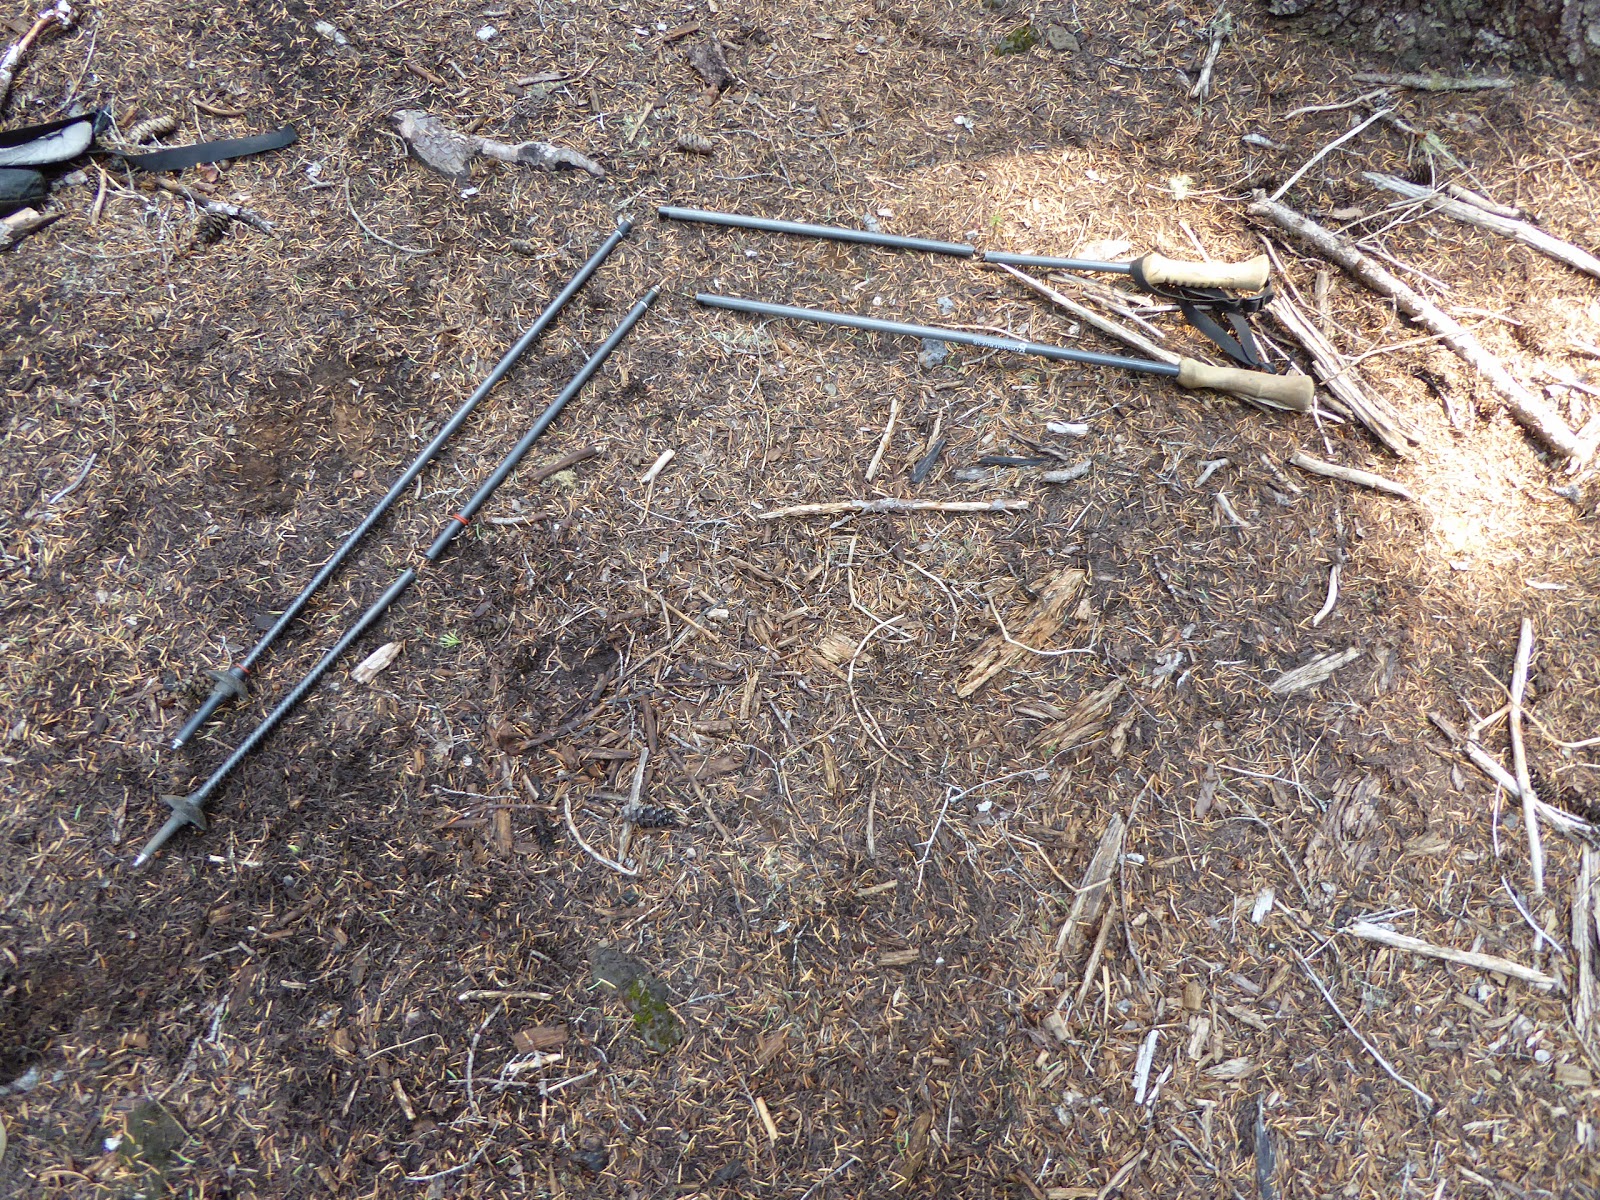
But then they snapped. Notice two broken sections, out of the four.
I left the one intact pole section I still had at the Cascade Locks Post Office (I hope someone found it useful), and bought a pair of cheap and heavy Leki Quantum poles. It took me a long while to get used to the weight difference, and I never quite liked them. But they did the trick for the remaining 520 miles of trail. And they were also very easy to extend and retract, so I even used them for my tent for a couple of nights.
Next time I'll just buy a pair of Black Diamond carbon fiber poles, like Idan had. They seemed light enough, but much sturdier than my GG.

Stove - SnowPeak Titanium LiteMax

A long time ago I bought a Caldera F-Keg system, and used it for short trips in Israel, and for my Israeli National Trail attempt. I really liked it simplicity, and I enjoyed cooking on alcohol. I never cared much for the time it takes to boil water. I don't mind waiting a few more minutes.
But, my plans had to change - because of the drought in California there were many rumors about which camp stove is permitted on the trail. There were some people claiming that alcohol stove is still legal, but I figured I'll give gas stoves a try.
I found the LiteMax at a sale in Sierra Trading Post for ~$37, so I grabbed it. Idan had an identical stove, and pretty quickly we figured out we can boil enough water for both of us on a single stove every evening, so we just carried one of them until we split up. The stove worked very well, and got the water to a boil fast enough for me. Though seeing other people using JetBoil I admit they were much faster. As I said - it was never an issue for me.
I was planning to switch to my alcohol stove when I enter Oregon, but when I got there I decided I'd stick with what worked out so well for me. So I used the LiteMax for the entire trail.
At the end, several of the tiny screws were a bit loose (one was missing). An email to SnowPeak, and they just sent me a small envelope with brand new little screws. That's all I needed. Good customer service!

Pot - Evernew Ultra-Light 0.75Liter

Even though I ordered the 0.75l Pasta Pot (or is it 0.7l? I'm not sure) from Trail Designs, I got the 0.6l Pot instead. I was afraid it won't be enough for me, and Trail Designs replaced it for me without a problem. In retrospect, I think the 0.6l one would have been enough as well.
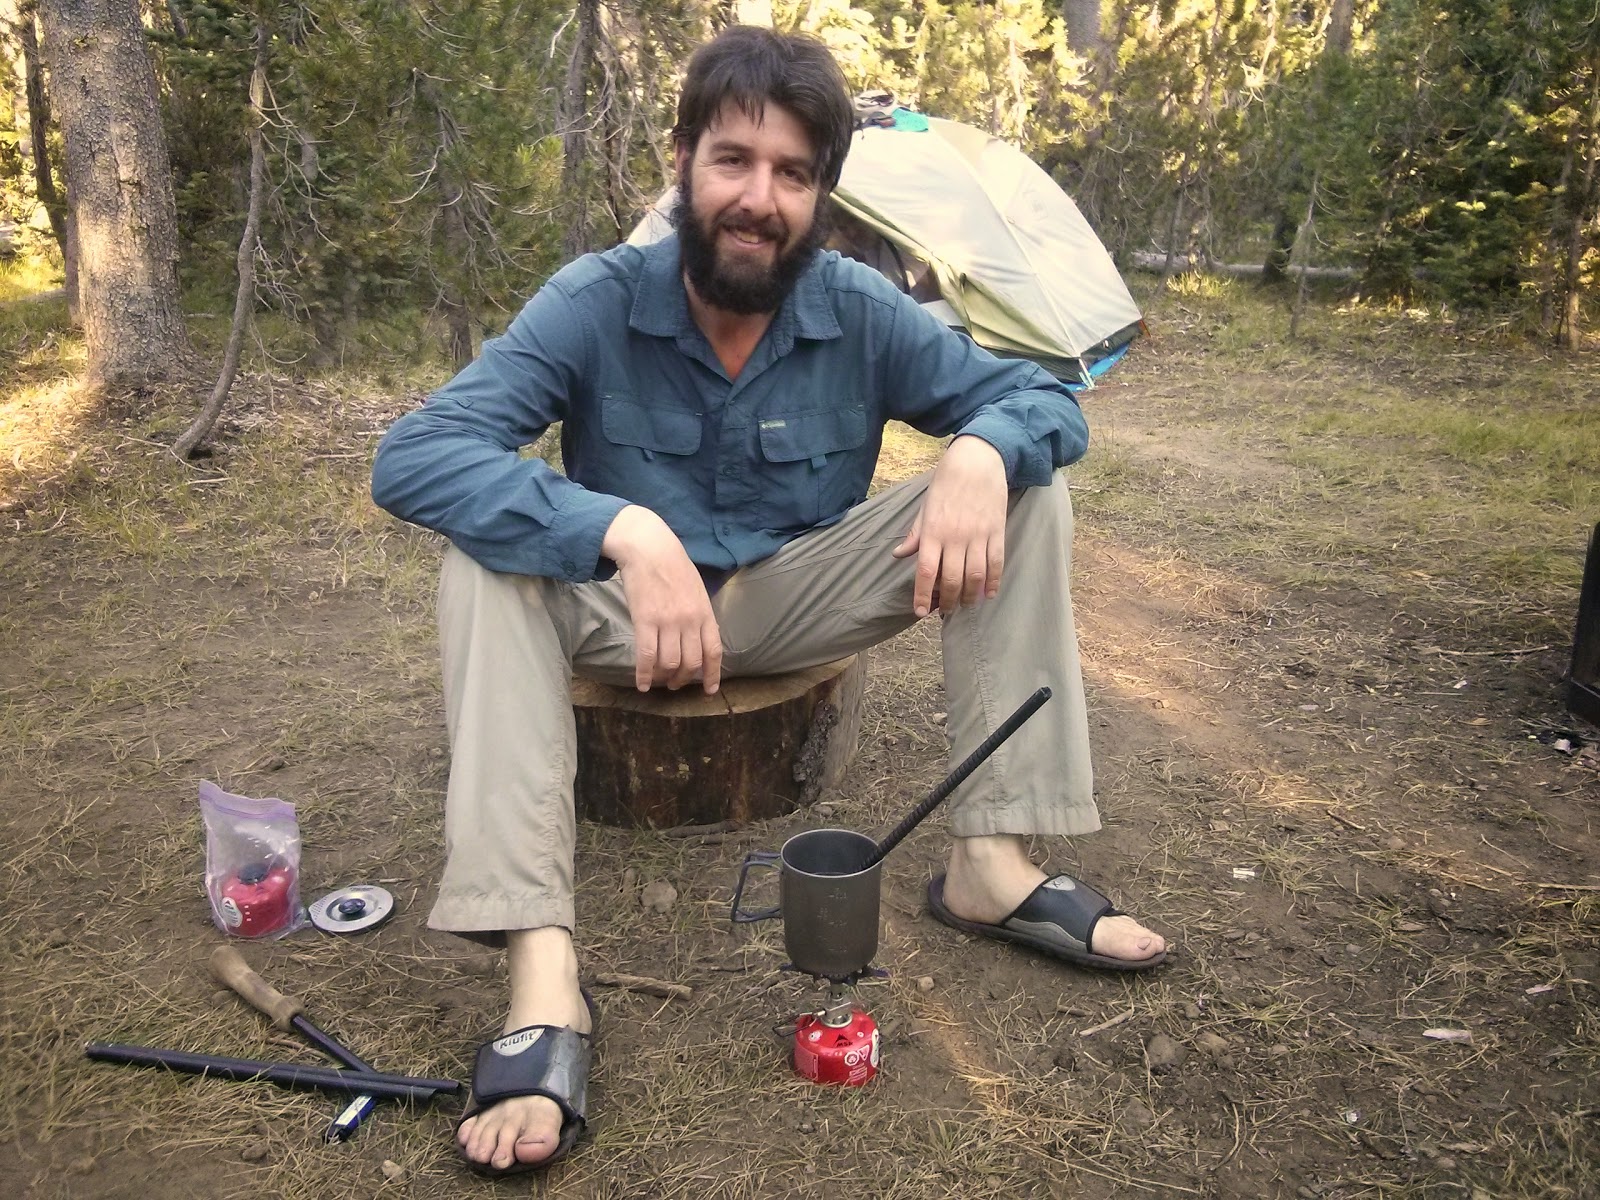
Stove + Pot + broken GG poles. The best method to get the tips off.
The pot can easily fit a small gas canister, including my LiteMax stove and a small lighter. It held enough water for me to boil for lunch. I guess that's all I need in a pot. I never cooked in it (Except for instant mashed potatoes, if you call that cooking, once or twice), so I also never had to clean it. It did the trick.

Spork - Sea to Summit Alpha Light long spoon

I have a couple of Light My Fire sporks back home, but the first thing I noticed when I landed in San Diego was that I forgot them behind. So I bought a long spoon at REI. I was very happy with it being a bit extra long than normal sporks/spoons, as it allowed me to easily eat directly out of the Knorr bag I was having for lunch that day. It was also nice having a flat ending, to easily scrape the bottom of the meal. I never felt like I needed a fork or a spork instead.

Hydration - Platypus Big Zip 3L/Smart Water bottles

I have the older model of the Big Zip (without that Low Profile thingie), but I really enjoyed it on the trail. I find drinking from a tube much easier than having to pull out a water bottle, and put it back in the side pocket afterwards.
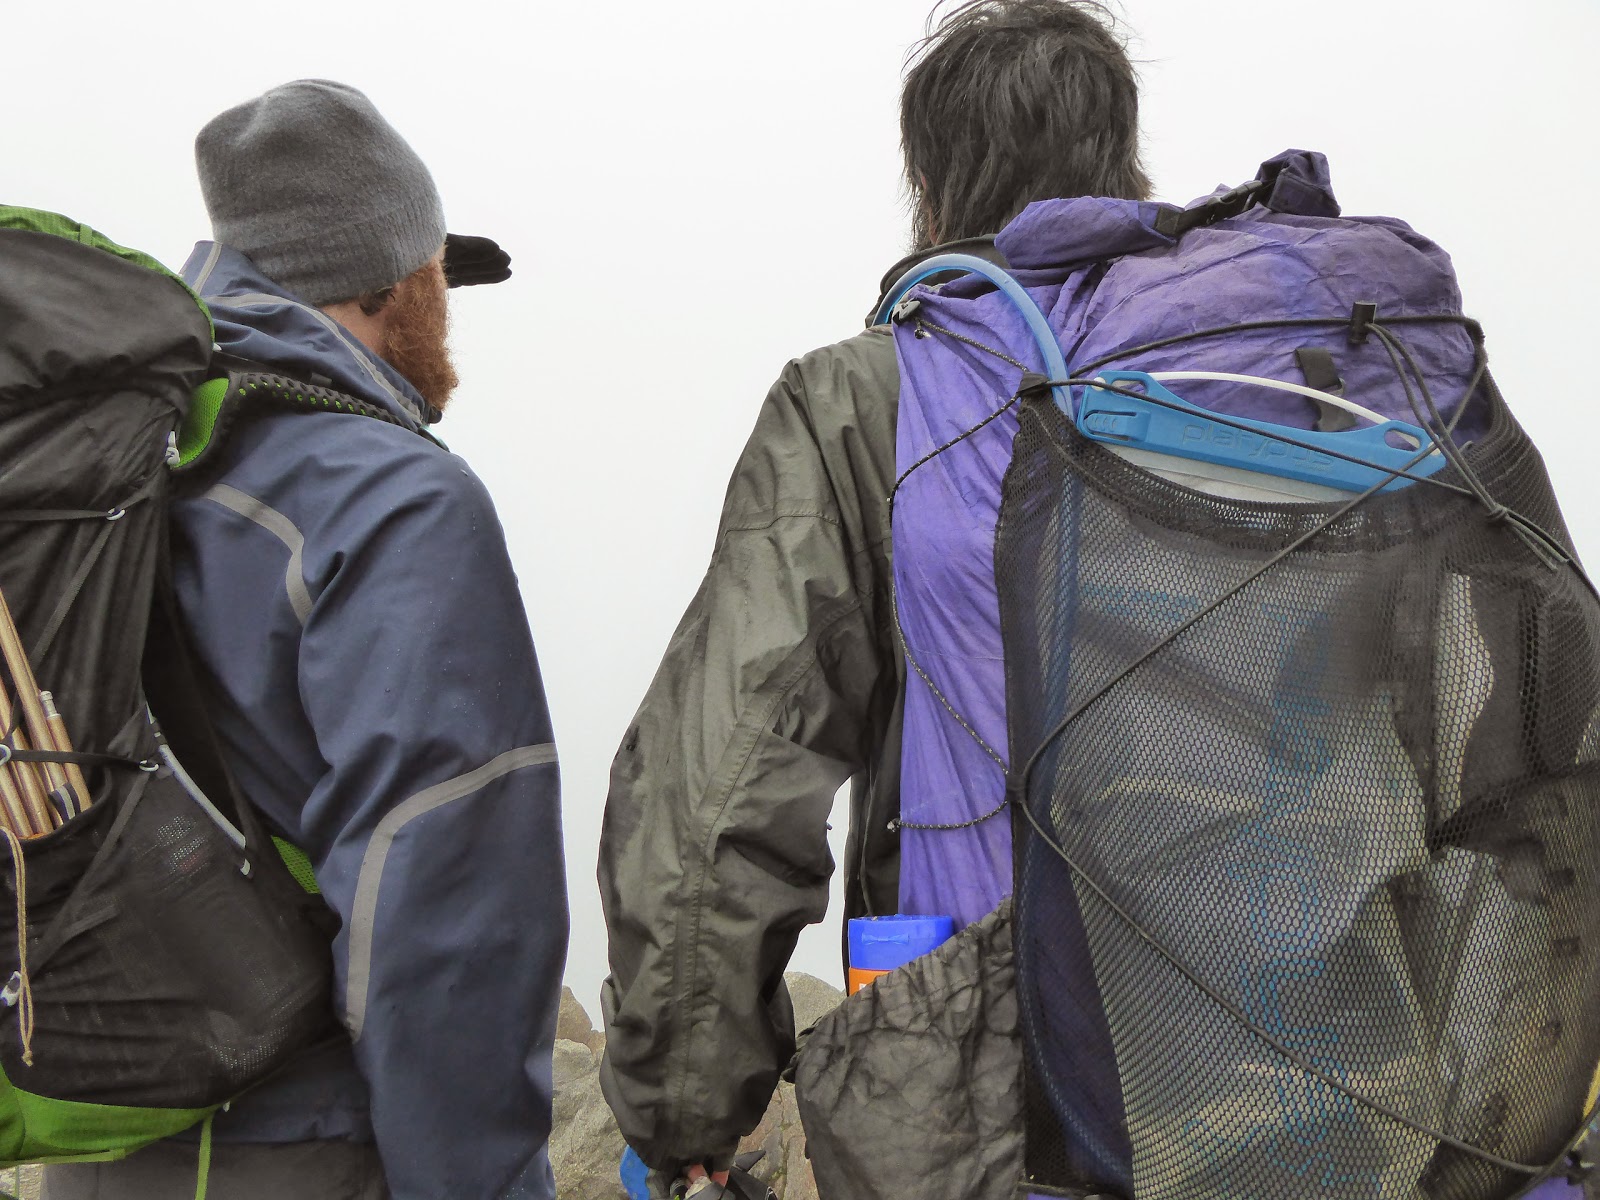
I carried the platypus inside my backpack, using the hydration port to pull out the hose, but in the Sierras I had my bear canister taking up too much space inside, so I moved the water bag to the outside mesh pocket. It was much more comfortable for me there, so I kept on carrying it on the outside from that point on.
I had the bag freeze on me once in the Sierras, at the morning before climbing up Whitney. It wasn't that bad - the ice thawed quickly enough, and the most annoying bit was the frozen hose, but the biggest issue was that it caused a small tear in the bag, and it was leaking slightly all the way to Lone Pine (about 3 more days). In Lone Pine I tried replacing the bag, but I couldn't get in touch with Cascade Designs in office hours, so I ended up putting a Compeed sticker over the tiny hole, and it held out fantastically all the way to Canada.
I bought two 1 Liter Smart Water bottles down in San Diego, right before starting the trail. I chose Smart Water because I heard the bottles last long, and they fit my Sawyer Mini filter. I used them all the way to Tehachapi, where I replaced one bottle with a 1.5 Liter bottle. A bit later I ditched that one also, and from the Sierras I only carried one 1 Liter bottle on me (along with the 3 Liter Platypus).

The bottle held out very well, and I actually carried the same one all the way to Canada. I still had a hard time finally throwing it to the bottle recycling bin back home in Tel Aviv, a few weeks after I got back home. But that was just me being overly attached to my gear. While the threads did get a bit dirty, and needed the occasional cleaning in hotel rooms along the way, the rest of the bottle was in perfect shape and didn't leak or burst. I was very happy with it.

Water Filter - Sawyer Mini/Aqua Mira

I bought the Sawyer Mini filter right before starting the trail, hearing many good things about it. I really liked its compact design and weight. I never used the little hose, and the packaged 16oz squeeze bag was also very unhelpful. It's almost impossible to fill the bag up from a stream, and I found it much simpler to just fill up one Smart Water bottle and squeeze it into another one.
Quickly enough I lost one of the rubber bands that should keep the filter from dripping from around the threads, so I had to squeeze the bottle and make sure the drops don't get into the "clean water" reservoir.
A bit later, we started using Aqua Mira to clean our waters as an extra step after filtering them. It was just before entering the Sierras, and Idan insisted that the water there might be a boot polluted, and filtering might not be enough. After about two days of this dual-filtering, I just gave up and started just using the chemical treatment, and not filtering at all - most water sources seemed so good, I didn't feel any need for further filtering.
As the hike went on, and I got complacent, I slowly started skipping the purifying bit on more and more water sources, until I also ditched the Aqua Mira drops completely. I just drank all the water directly, and never had any problems. I can not recommend this method at all to anyone else. It is probably the most stupid path to chose. But it worked for me.

Gloves - some unknown brand/Sea to Summit Eclipse Paddling Gloves

On my third day out, I bought a pair of sun gloves at Dave Super's gear store in Mt. Laguna. I just bought the cheaper brand gloves over there, but I really liked them. They were light and airy, with an actual hole at the palm of my hand, and cut-off fingers. They were very comfortable, and lasted almost half way up to South Lake Tahoe (mile 1093).
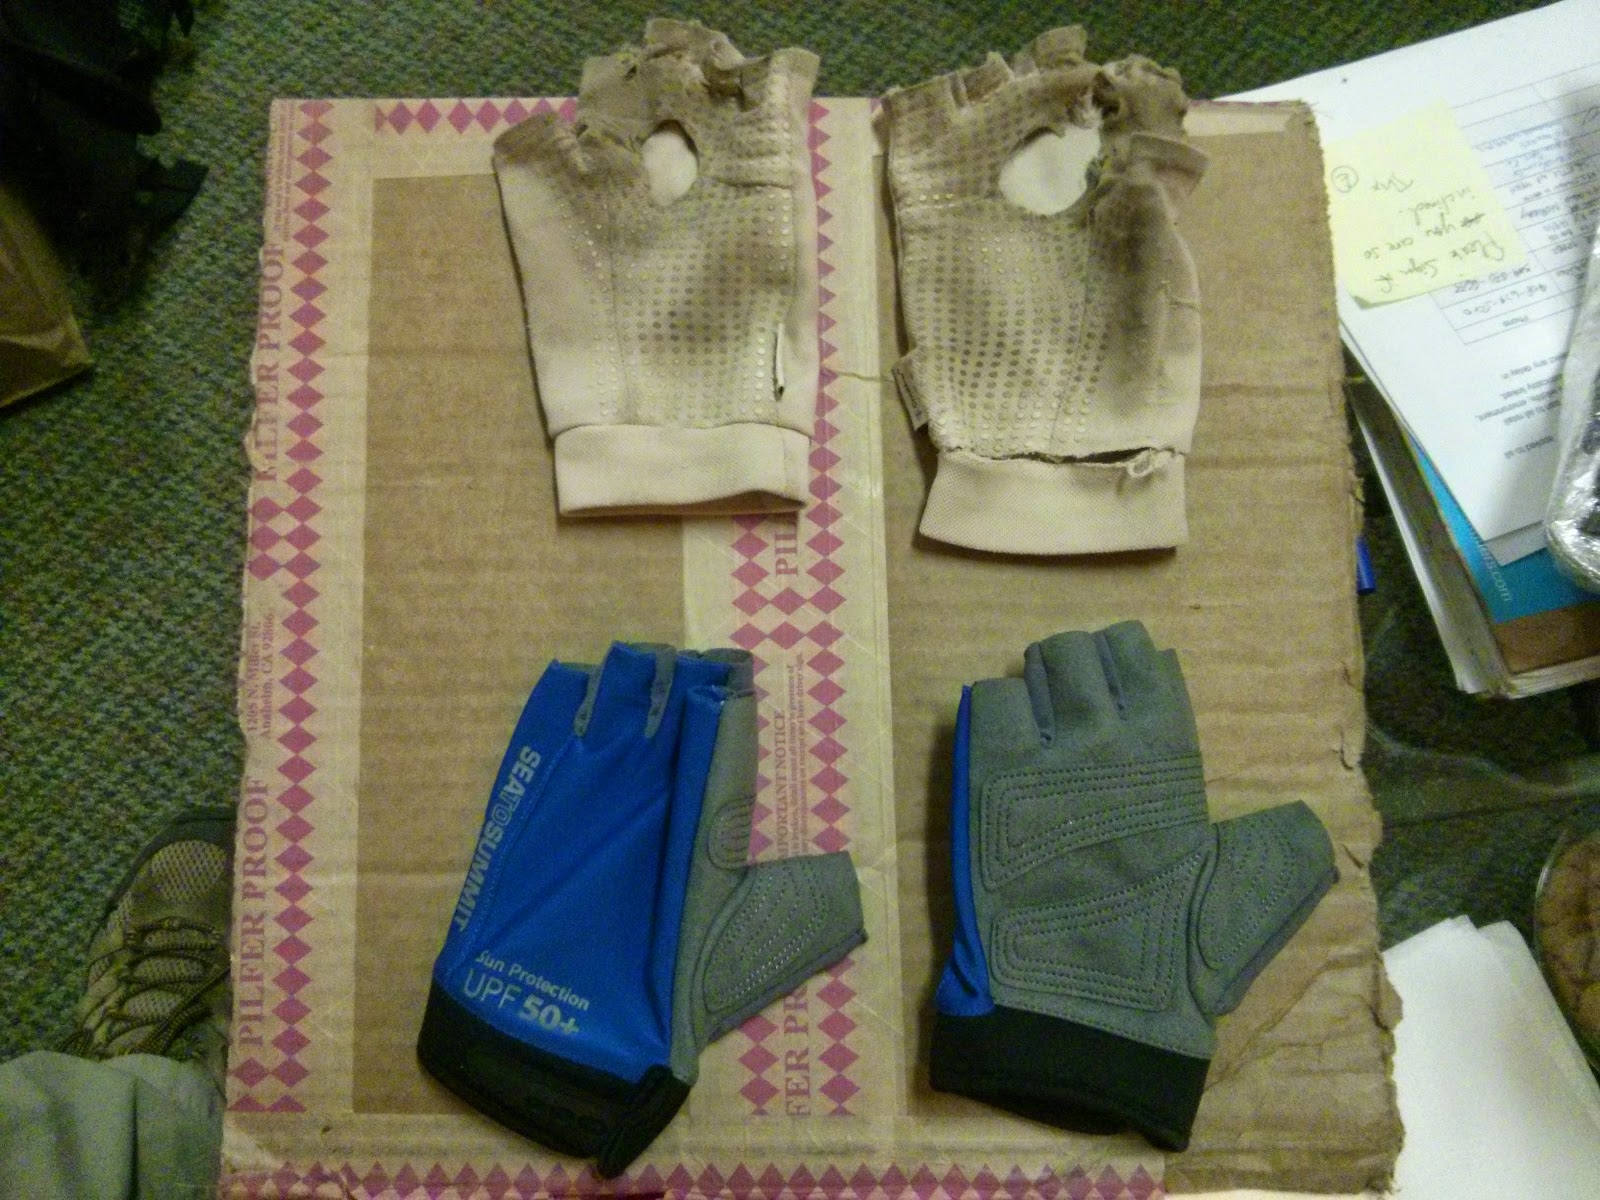
Old vs. New
In Lake of the Sky Outfitters I bought a new pair of sun gloves, this time going for the Sea to Summit pair. I didn't like that pair as much, especially the hard leather bit on the palm side, which was not comfortable, and a bit too hot sometimes. They were also a bit harder to take off. I recently found out it's made out of fake leather, which is a comfort. They did hold up nicely all the way to the end, and worked well in protecting my hands from the sun.

Camp Shoes - cheap flip flops

I just carried a pair of cheap, simple, flip flops I had for hiking for several years. The right flip tore up right after leaving Tahoe, but I managed to carry it all the way, with the help of some duct tape emergency field repair. It worked. I actually carried them back home to Israel, and threw them to the trash bin next to my house.

Towel - PackTowl UltraLite

Not very handy at all. I thought I'd carry it in case I want to dry off after a quick shower someplace, but almost every place that had a shower, had a normal towel I can borrow. I think I actually used it to dry myself off less than 5 times. I did use it occasionally to dry the inner walls of my tent in the morning, after a damp night. That was useful, at least.

Headlamp - Petzl Zipka 2

I have an older model of the Zipka (called Zipka 2, oddly enough), that has a red colored LED in addition to the standard white one. I really liked the red option for rummaging around my tent at night, or a quick excursion to the woods in the dark. The batteries do last a long time, especially since I didn't use the headlamp that much (probably an average of ~1 minute every night). I didn't night hike on the trail. I just made sure to keep it next to me, when I went to sleep each night. In case I'd need it.

Knife - Victorinox Tourist

I think I had this model. At least - I had the same tool set on mine. Anyway, I didn't use it much. The big knife was nice to cut cheese (I learned the hard way that this is a euphemism to farting), and cutting open my care packages. The small scissors were also nice to have occasionally. I could have easily managed with a smaller version (And even considered buying one, but then thought $25 is too much for such a minor weight difference), or even without any knife at all.

Solar Charger - sCharger-5

I bought the sCharger-5 along with the "Emergency Kit", mostly just for the included external battery. I have the older model of the panel, so I drilled holes in the corners myself, in order to secure it to my backpack while walking. I didn't really use the charger on the trail much, using the external battery (next section) during most sections.
Only in the two long sections of the Sierras (each one was 7 days between towns/electricity) we really had to use the panels. After I realized I am carrying it on my back and never actually using it, I sent it away, and kept on relying on the external battery.

External Battery - Lepow Moonstone 6000/Anker 2nd Gen Astro

I started my hike with the Lepow battery I got from Suntactics. It has 4 LEDs that show the current state of the battery. After several weeks on the trail, I noticed that the LEDs go from 4 (full charge), down to 2, and then the battery appears dead. As if it can only contain half the charge. Once I got to South Lake Tahoe I emailed Lepow and asked them about a replacement. In Mt. Shasta I realized I should contact Suntactics, as they were the re-sellers of the battery I got (Lepow didn't even know who I am talking about), and they (Suntactics) immediately agreed to send me a replacement battery to Etna (It was really easy - just a web chat away with Suntactics customer support).
Sadly, the battery I got in Etna had the exact same problem - LEDs going down 4->3->0. I just went into Amazon, and ordered an Anker battery. It's a brand and model I saw other hikers use, and it was smell and lightweight enough for my tastes.
The Anker worked perfectly. Helping me keep my phone with enough power for 4-5 days between towns, and that's on top of an old phone, with crummy battery. So I was happy.

Camera - Panasonic TZ20/TZ40

I started my hike with the TZ20, a bit of an older model from Panasonic. I mostly liked the GPS feature, allowing me to keep track of where I took every picture. It is sometimes annoying, when I pull the camera out and turn it on, and have to wait for the GPS to get a fix. Sometimes I had to wait for several minutes, though most times it would get a fix in less than 20 seconds.
I also really liked the X20 zoom I had, which allowed me to take nice photos of distant mountain tops (I rarely used the full X20, but it did give plenty of room to play with). I never really played with the different camera options, just shooting on "auto" all the time.
The camera got a bit wet right after the half way point near Chester, and stopped working. I sent it to some lab from Mt. Shasta, but they sent me a repair quote of ~$160, so I told them to just send the camera to my home base, and later just bought a newer camera from B&H, to Ashland. One side effect is that I don't have many good photos of Northern California. Oh well.
The new camera was just a more updated model. Same GPS functionality, but this one also has Wi-Fi. The Wi-Fi option is a bit sketchy - you can't transfer more than 10 photos to your phone at a time, so whenever I reached town, I'd copy them in small batches. It was annoying, but at least it was much easier than before. Now that I'm home, I tried setting up auto transfer from the camera to my home computer, I still couldn't get it to work. It's very buggy and not well documented.
But the camera itself does feel a bit better than the previous model. Now with X30 zoom, there's even a bit more zoom to play with. I still shoot on "auto", and I am happy with the results.

Smartphone - Google Nexus 4

I took my phone from Israel with me for the hike. Being a GSM phone I knew it would work well with AT&T and T-Mobile networks in the USA. I managed to get an unactivated T-Mobile sim card beforehand, and when I landed I activated it on a pre-paid plan for $30/month for calls+data.
Pretty soon I discovered that I didn't have a lot of reception on the trail, especially compared to AT&T reception. I decided to switch to Straight Talk, an MVO that operates over AT&T network and offers a prepaid monthly option as well. for $45 I Got unlimited national minutes, and 3GB of data. I also used Google Voice to call home (international), so having national only minutes didn't bother me. The reception was all right throught most of the first half of the trail. Up in Oregon I had a bit less, and almost no reception in Washington. Verizon has much better reception up there, but they are not compatible with my Israeli phone, so they were not an option for me.
I used many different Android apps on the trail, on which I'll elaborate further in a future post. But having a smart phone was definitely a good call for me. It was very handy and useful, and I'd highly recommend it.

Friday, December 19, 2014

My Post Hike Gear Review (Pt. 2 - Clothing)

(My complete gear list)

Hiking Shirt - Columbia Silver Ridge Long Sleeve Shirt

I think I wore that shirt every single day for my entire trip. So it's 152 days on trail, adding a couple of days before I started, down in San Diego. That's pretty impressive.
On the trail, I always wore long sleeves. I don't recall a single time I folded the sleeves up. Even in the hot desert, it was never too hot for me. This way, I also didn't use any sun tan lotion for most of my hike - with arms and legs covered, and having a buff over my neck, I only rarely put some on my face. That was a big bonus, as putting on sun tan lotion is always a pain.
The material is very light and feels nice against my skin, and it dries quickly. The shirt was of excellent quality - I didn't have a single tear or seam falling apart. The only indication it was used constantly for 5 months is the way the color faded a bit. I would definitely wear a similar Columbia shirt for my next hike.

Hiking Pants - Columbia Silver Ridge Cargo Pants

Same as the shirt - Wore the same pair of pants throughout the trip, and I don't have any complaints about them. No tears, no seams falling apart. The only problem was my weight loss - I had to pull the belt really tight, and somehow manage the excess material around my waist so it won't bother me too much. I should have bought a smaller pair somewhere half way through, but I wanted to hike in the same pair for as much as I could. I'm silly that way.
Same clothes for the entire trip. They held up very well.

Boxers - Exofficio Give-N-Go

I had two pairs of those boxers, and I switched between them all along the trail. I admit I was not switching every day... It all depended on when the next laundry is expected, and how hot and uncomfortable I felt with the pair I was currently wearing. Through most days, they worked just fine, though I did have the occasional chafing and raw spots here and there.

Hat - Columbia Bora Bora hat

And here's the hat.
A very nice and comfortable hat. I think I can count on one hand the amount of days I didn't wear it (some rainy days up in Washington). Even in the blistering heat, I was never always comfortable with it over my head, with the small mesh allowing some wind to chill my head.
It took me well over 2 months to figure out I don't need the annoying string attached to it. I used to just put it behind my head (and not under my chin), figuring I might use it in some very windy conditions. But after hiking over half the trail without actually needing it, I finally cut it. The elastic cord around the head worked just fine for keeping the hat in place.

Beanie - ZPacks Micro Fleece Hat

I started without any beanie, and quickly discovered I am losing a lot of heat from my exposed head, during the night (My quilt doesn't have a hood). I bought the ZPacks hat at the ADZPCTKO for $10, and it did the trick. Warm enough for all the nights on the trail, and I also hiked with it a couple of times. Great value.
The Ghost Whisperer Anorak

Wind Shirt - Mountain Hardwear Ghost Whisperer Anorak

The link above is to the hooded jacket, but I had an older version, with no hood, and only half zip in the front.
I carried it with me for rain and wind protection in the first third of the trail, up to Kennedy Meadows. I figured I wouldn't have many rainy days in the Southern California desert, and I was right. I remember maybe 2 days of actual rain, and I probably put it on while hiking maybe twice more to protect me from some cold winds. It did the trick.
I now carry it with me every day, just in case a sudden rain will catch me unprepared. The minimal weight makes it very comfortable as a last resort.


Rain Jacket - Marmot PreCip

A great rain jacket, which I keep on using since my days on the AT, 12 years ago. In 2008 I bought a new jacket, since my old jacket was peeling on the inside, but I've used it since 2008 and on the PCT, and it performed wonderfully. I had just a few rainy days on the trail, and I really liked all the different venting options the PreCip offers to deal with different temperatures and rain types.
In the hot and rainy days of Northern California I sometimes took off my hiking shirt completely, and just put on the jacket. I admit - it doesn't really feel comfortable against the skin. But with the pit zips open, and the front zip also only part way closed, there was enough ventilation to prevent too much sweating, and enough protection at the top to prevent getting wet by the rain.
And here is the infamous PreCip
In the cold rainy days of Washington I used to close it all tightly around me. But it was still easy enough to open up the Velcro at the cuffs, to allow some air inside, or open the pit zips again a bit later, when the rain wasn't as strong, and sweat was starting to build up. It really does fit many different rainy scenarios.
I also used it in camp, at the evening, when it was not cold enough to put on my insulating jacket. And last but not least - even in the coldest nights, when I put on everything else to keep me warm, I'd keep the PreCip crammed inside its own pocket, and used it as a pillow.

Jacket - Mountain Hardwear Thermostatic Hooded Jacket

I was really happy with this jacket. Even at the desert, the nights were chilly enough for me, so I used it in camp on many evenings. It also performed well as a pillow, when I wasn't using the hood to keep my head warm. In some colder nights I wrapped the empty sleeves around my neck and shoulders. I think I Actually wore it during the night only once or twice.
Their down jacket is even lighter, but I figured I carried enough dead geese, and the synthetic insulation will hold better in case it gets wet.

Base Layer - Columbia/Marmot

I wore the base layer on most nights in my tent, and they kept me warm enough through most of them. On the colder evenings I'd put them on right when I got to camp.
I can't find the exact Marmot base layer pants I have, but both the pants and the shirt are nothing special. I think most light-weight warm-ish base layers would function similarly.

Socks - IceBreaker/Injinji

I started with two pairs of IceBreaker Hike+ socks, which worked just fine up to Wrightwood (Mile 369). They started having holes in them, so I ordered a three pack of Injinji's toe socks to there. It took a short while to adjust to the different feeling, but after a while they felt natural, and my feet didn't have any more serious blisters. I switched between the Trail and Run and whatever else models of Injinji, getting new socks in Lone Pine (Mile 788) and Belden (Mile 1289). I think the 3 pairs from Belden lasted all the way to the end. Impressive.

Shoes - Merrell Moab Ventilator

I started the trail with a pair of Merrells I used in Israel, and also hiked around the Mont Blanc with them. They were still in pretty good shape (~150 miles on them, I'd guess). I had some blisters at the beginning
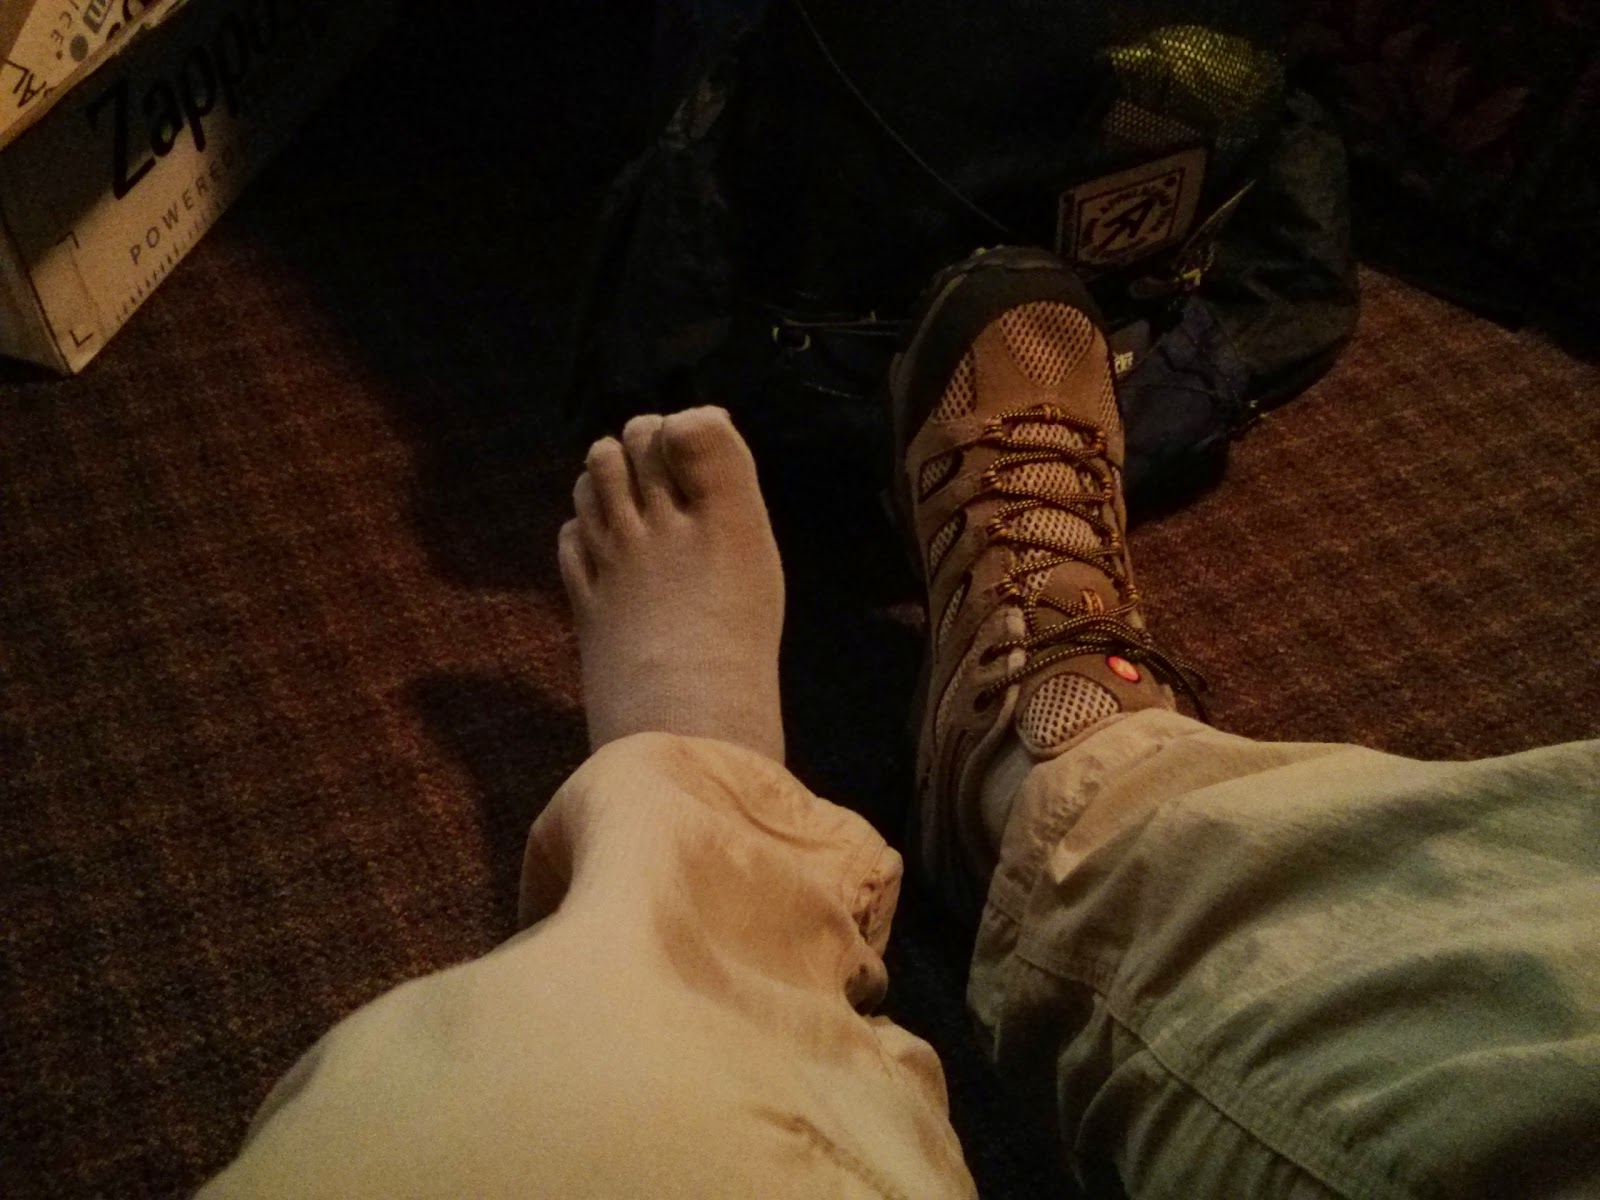
New shoes and socks

Monday, December 8, 2014

My Post Hike Gear Review (The Big Three + 1)

(My complete gear list) I think it's about time I'd post some of my thoughts about the gear I used on the trail. I am quite happy about my initial gear selection. Most of my gear held on for my entire trip, with a few exceptions. I also ditched a few items I decided were not worth the weight.
Without further ado, here is my gear review:

Backpack - ZPacks Arc Blast 60L

Enjoying the view towards what should have been Alta Mountain.
The pack had plenty of room inside for all of my gear. In the Sierras I carried the BearVault 500, and it fit in easily. I had to strap my tent on the outside of the pack during that time, but it was still comfortable enough.
The Cuben Fiber worked perfectly for rain protection. I didn't have a lot of rainy days on trail, and only got completely soaked twice. On both times, though, all of my gear remained totally dry inside my pack. I never carried a rain cover, or inside liner. There was no need.
The belt pouch didn't have the best closing mechanism - at the beginning I had a tiny clip, which I couldn't close with one hand. I switched it to a Velcro version at the Kick Off, and it wasn't much better - The Velcro stopped working after a short time, and at the end I just used a rubber band to keep the pouch closed during the rain. The pouch was deep enough for me to leave it open most of the time, without worrying that anything falls out of it.
The Velcro at the top of the pack also stopped working after a while, but I was still able to close it tightly enough using the clip, so it didn't bother me much.
I know some hikers like to keep adjusting the straps and lift loaders after putting the pack back on. The straps are not easily pulled or released on the shoulder straps, or load lifters, but it didn't bother me much. I just found a setting that worked well for me, and didn't adjust the straps much for most of the trail.
The medium size belt I got was a bit too big for me, especially after losing 35 pounds on the trail, but it was still functional when pulled all the way tight around my hips.
All in all, I am very pleased with the pack. At the end of the trail it still performed well, and showed just minor wear. I have sent it back to ZPacks, and they repaired everything free of charge, and sent it back to me. Great customer service.

Sleeping Bag - ZPacks

I bought the 20 degrees quilt option, with only adjustable straps at the bottom (no zippers). I was a bit cold at the beginning of the trail, but it was mostly because of my sleeping mat (more on that later...). I also got the 850 fill water resistant down (I see they offer it in 900 fill now). I am not sure how much it would have helped in a crisis, but I just kept it packed inside its Cuben Fiber stuff sack, and it remained dry during my entire hike.
On the first few days, I could feel the heat escape through my head. I started sleeping with my down jacket hoodie on (usually without putting on the jacket), and later used my fleece beanie. That did the trick. On cold-ish nights I used both the beanie and the hoodie, and even wrapped the jacket's sleeves around my neck for extra insulation. In the really cold nights, I wore the jacket, of course.
I tried using the straps both directly under me (and over the sleeping mat), and also around the sleeping mat itself. The quilt was way too tight when wrapped around the mat, and it also felt less warm that way. At the end, during the cold nights I had in Washington, I just closed the quilt tightly around me, and it worked out fine and kept me warm.

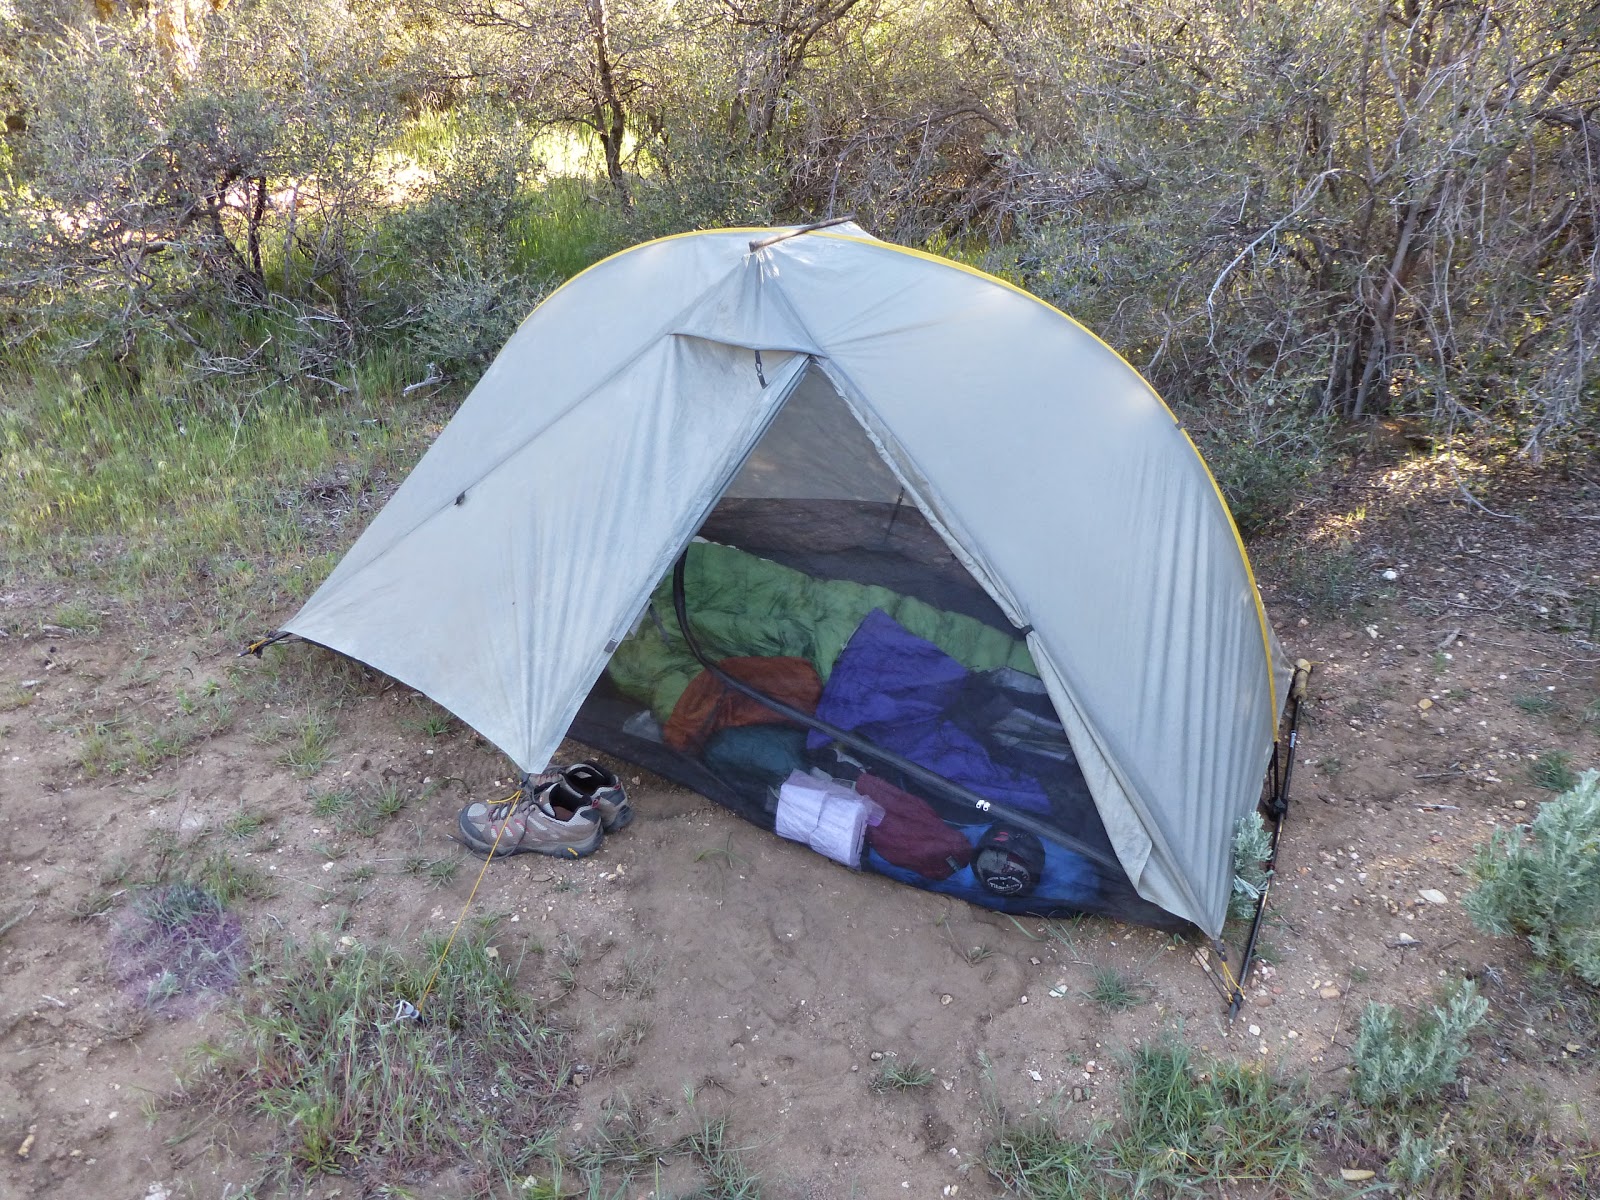
Tent - Tarptent Rainbow

My tent is a bit old (Bought around 2008), so it is a tiny bit different from the newer Rainbow model. But it's basically the same.
Everything I ever needed for my hike.
Before the trail, I used to set it up as a freestanding tent, using my trekking poles at both ends, and only using two stakes to secure the sides to the ground. I used it that way up until Kennedy Meadows (Mile 702), and it withstood some very windy and stormy nights with no major problems (As long as I was inside the tent, it remained on the ground).
I had a small tear in the Velcro used to secure the trekking pole to the tent (The new model have a different mechanism there), and Henry Shires fixed it for me at the Kick Off. He also sent me a replacement pole section for a section that seemed like it was going to snap soon. I had another pole that seemed just as bad later on, but it held out until the end.
Another problem I had with the tent was with the zippers - the netting zippers stopped working one after the other, and the one on the outer fly as well. The outer one wasn't very important to me, since the Velcro over there did the trick. But the netting zippers were very annoying. At first, I tried cleaning the zippers with some oil, and using a pair of pliers on the sliders, and it worked for a short while. When I got to VVR it kinda gave up, and I emailed TarpTent and got them to send me extra zippers to Toulumne Meadows. But before getting there, while resting in Mammoth Lakes, I went over to an awesome local seamstress that replaced one zipper for me, and kept me going with it all the way to Burney.
In Burney, after a terrible night with effectively no bug netting at all, I finally tried using the sliders I got in the mail, along with zipper stoppers I found at the local seamstress shop, and replaced both zippers on the netting. This time it all held all the way to the end. I think in Bend I finally fixed the rain fly zipper as well.
My trekking poles' mechanism was not very comfortable to adjust, and every evening I had to fight both of my poles just to extend them a bit, and then once more in the morning. Before entering the Sierras I gave up on setting up the tent in the free standing style, ordered 4 Easton stakes, and used them for the rest of my hike. It was worth it, for sure.
Many people worry about condensation inside tents, especially in single-walled tents such as TarpTents and ZPacks. What I liked best about my Rainbow was its size - even on damp and wet nights, when it was covered in dew, both outside and inside, my gear would never touch the inner walls, and would not get wet. In the morning, I would just pack my sleeping bag and mattress while inside the tent, move everything outside, and then try to dry as much as I can on the inside of the tent, using my camp towel. I would then just pack the tent, and only unpack it in the evening, on the next camp site. I never bothered spreading it to dry at noon, or had my sleeping bag get wet during the night, or any of those water/condensation related problems.
In conclusion, it was a great tent, and I was very happy with it. I highly recommend it.

Sleeping Mat - Therm-a-Rest Neo-Air X-Lite small/reg

I started my hike with an older Neo-Air, size small. I bought the small one because I used a small inflatable foam mattress back on the AT, and it worked well for me back then. But the Neo-Air was not as good this time.
At the beginning of the trail I had plenty of cold nights, and I thought that's just the way it's going to be. But pretty soon I was wearing everything I had during the night, and wrapping my jacket around my feet (which felt the coldest during the night). After entering the Sierra's, and realizing both Idan and Yair are much warmer during the night, Yair finally suggested that maybe my mattress is not good enough. The theory was that because I have a sharp drop from the mattress, just under my knees, and because I was sleeping in a quilt, which is open underneath me, cold air is entering freely into the bag during the night.
That first week out of Kennedy Meadows I stuffed unused rain gear under me, around that hole between the mat and the quilt, and it seemed to improve my sleep temperature. When we got to Lone Pine I just bought a brand new normal sized Neo-Air, weighing at 450gr (~80 more than the small), and only a bit larger.
Since then, I was quite happy with sleep system. I am sure I had some pretty cold nights further on the trail, but I only remember one more night of "wearing everything I have", and most nights I was warm enough inside my quilt.
Regarding the comfort level of the Neo-Air - it's awesome. I twist and turn through the night anyway, but the mattress worked fine when sleeping on the side, as well as on my back.
Many people complain about the rustling noise these mattresses make. It never bothered me. Not the noise coming out of my own mattress, nor the ones from nearby hikers (And many others do use the Neo-Air).

Tuesday, March 4, 2014

Cheap, Light, Durable. Can't have it all.

I got my "Strange pair of shades" about two weeks ago, and haven't really used them anywhere. They didn't look so good, so I figured I'll save them for the trail. Once I'm all stinky and dirty, I don't think anyone would mind them.

Well, I took them out of their little container last night, put them on for several minutes (while at home), and left them on the kitchen table. This morning I decided to fold them back into the container, and they just snapped.

Nice table cloth though, right?
I thought I Got a cheap, light and durable item for my hike, but I guess there are no shortcuts. The high quality, light stuff is expensive. Or at least, not as cheap as those shades were. I guess I will just buy a pair of standard, normal shades at some supermarket. They will be heavier, but they will last longer.

UPDATE:
I got a reply from SportEyz, and they have already refunded my purchase, including the shipment. I can't complain about their customer service.

Friday, January 31, 2014

Solar Panel Part 2

During my short trip in the Carmel recently, I tried testing my improvised solar panel to see if it can charge my phone. It did not perform as expected. In retrospect I can say it was probably because we were mostly under trees, and in the shade. Not the optimal conditions to test a solar charger. But when I got back home that day, I felt as though it's not going to work between us.

After reading many favorable reviews on the Suntactics sCharger 5, I decided to buy a kit, along with an external 6000mA battery. The kit also comes along with a 10 LED usb powered light, which I'm going to leave at home. I really don't see any use for it on the trail.

The price was not so bad, with a sale price of $152.95, and a work colleague of mine was just taking of for 4 days in Seattle, so I took the opportunity and asked him to bring it over for me, after I order it to his hotel. Luckily, this crazy plan worked, and I am now the proud owner of the sCharger 5. Yay for me.

Panel with case, battery with its own little case, the LED is hiding beneath the instruction manuals.
The panel does look much better than my improvised one. Sturdy and simple, just a panel with a USB output. The external battery also seems like a good deal, with two USB outputs (1.2mA and 2.1mA), so I guess I will be able to charge both my phone and my camera at the same time (I just need 2 USB cables for it). This will come in handy, I guess.

I just need to figure out how I can secure the panel to my backpack, so it will be out and open to the sunlight while I hike.

As a side note - after ordering the sCharger, I took my improvised panel for another spin. This time I just put it outside of the window, in direct sunlight, and it charged two phones easily. I guess I was too quick on the gun with the decision to buy a charger. But the sCharger does come with the battery, which is a bonus, and it does seem better than mine anyway. So it was not all a waste of good money...

Saturday, January 25, 2014

Fire Hazard Warnings

I was a bit worried about the snow sections of the PCT, having no real snow experience except for the recent trip around the Mont Blanc. So I'm a little bit relieved so far, with the current snow levels so low it appears I won't have a hard time crossing the Sierras even when starting a bit early.

Sadly, this drought also causes severe fire warnings in California, as a recent PCTA blog post announced. It seems open fire cooking stoves will not be allowed in most places along the PCT. So there goes my plan to use the lightweight Caldera Keg System to cook my dinners.

The quest is on, to figure out what stove I'll buy/use on the trail.

On the left - Caldera Keg-F system with spare can. On the right - MSR Whisperlite stove with fuel bottle, wind screen and pot.
I took out my old MSR Whisperlite stove from the gear closet. I bought it back before I started hiking the AT. I didn't know what I was doing with it, and filled up my fuel bottle with kerosene. For the first 4 days on the trail, I cooked mainly in open flame burning over small kerosene puddles it created. When I got to Neals Gap, I went through the "Gear Shakedown", and got rid of loads of stuff I sent back home. I bought an alcohol cat stove which cooked my dinners along the trail, and I hadn't looked back on the Whisperlite since...

My complete Whisperlite kit. The pot is in a pretty bad shape.
Well, I did take it with me on several 2 day outings here in Israel, and learned how to use it properly with White Gas, to cook decent meals. I can make it work.

Today I weighed it, and it's around 322gr (11.35oz) for the stove itself, 335gr (11.81oz) for the pot and lid, and about 585gr(20.63oz) for a 3/4 full fuel bottle. That's crazy! I want my alcohol (stove) back!

I will probably replace the pot to some titanium <1L cup. I think will be enough for my daily meals. But that's more money on gear, and more logistics to get it to Israel.

I started looking at MSR/Primus/Jetboil sites for their lightest stove options. Some are really expensive, and some are not that light. MSR have the impressive but expensive Reactor Stove Systems ($190). It is a bit like JetBoil ($160) - an integrated system with a pot stand and pot. They also have the lighter and simpler MicroRocket ($60) and PocketRocket ($40) (be careful - this is also the name of a famous sex toy).

I just got a tip to go to Sierra Trading Post, after liking their Facebook page. That gets you an extra %25 off, until Jan 28th. They are offering the Snow Peak Litemax Titanium Stove for $35, with this sale. Seems like a good deal. Shipping to Israel will double the price, but maybe I can have it shipped to somebody in the US to keep it for me until I get there.

UPDATE:
I have ordered the above mentioned Litemax, and also an Evernew .75 L Ultralight Pasta Pot from TrailDesigns.com. They will wait for me at the Trail Angels' house in San Diego. Can't wait to get there and open all my presents...

Wednesday, January 1, 2014

Cooking Test

Several days ago I had a chance to try out cooking my meal "trail style", using my Caldera Keg-F Stove System and a Knorr dinner bag. I know it's not exactly like cooking on the trail, but I want to feel confident I use the proper amount of alcohol and water, and get a satisfying meal at the end.
Caldera Keg (with a spare keg), fuel bottle, spork and lighter, and the meal I'm going to eat
For this test, I used just about 20ml of alcohol in the stove. I put in a bit too much water in the keg, so for the next attempt I'll put less. Those 20ml burned for about 8 minutes, though I got a boil at around 7. So again - a bit less fuel will also work for me.
The stove inside the Caldera Cone
After the boil, I poured most of the water inside the Knorr bag (Rice with Mujadarrah), and let it sit for 10 minutes.
Waiting for the rice to cook, while watching "Alone in the Wild" on TV
I think the 10 minute mark for cooking the rice in the bag is good. The rice was completely cooked. Maybe even a bit less time would work, but unless I'm starving I don't think It'd matter much. After the rice is done, I poured in about 1/2 a bag of powdered mashed potatoes, to turn it from a soupy rice meal, into a chunky potato/rice mix. It doesn't look too tasty, but I kinda like it, and it definitely filled me up, and got me warm inside.
Yum yum. It looks oh so inviting.
I already imagine myself wolfing down one of those inside my tent, sitting under my quilt.

Oh - and a happy new year to you all. The year of my Pacific Crest Trail Hike.

Saturday, December 21, 2013

Solar Power

I have started looking into solar panels back around 2007, while following Craig Stanton's blog of hiking the PCT. I really liked the fact he was using a GPS to log the trail while he was hiking it, mostly because I am really into mapping. He was using an OHararp LLC GPSlogger (An older version of this) that came along with a solar panel to keep it running during the long hike.
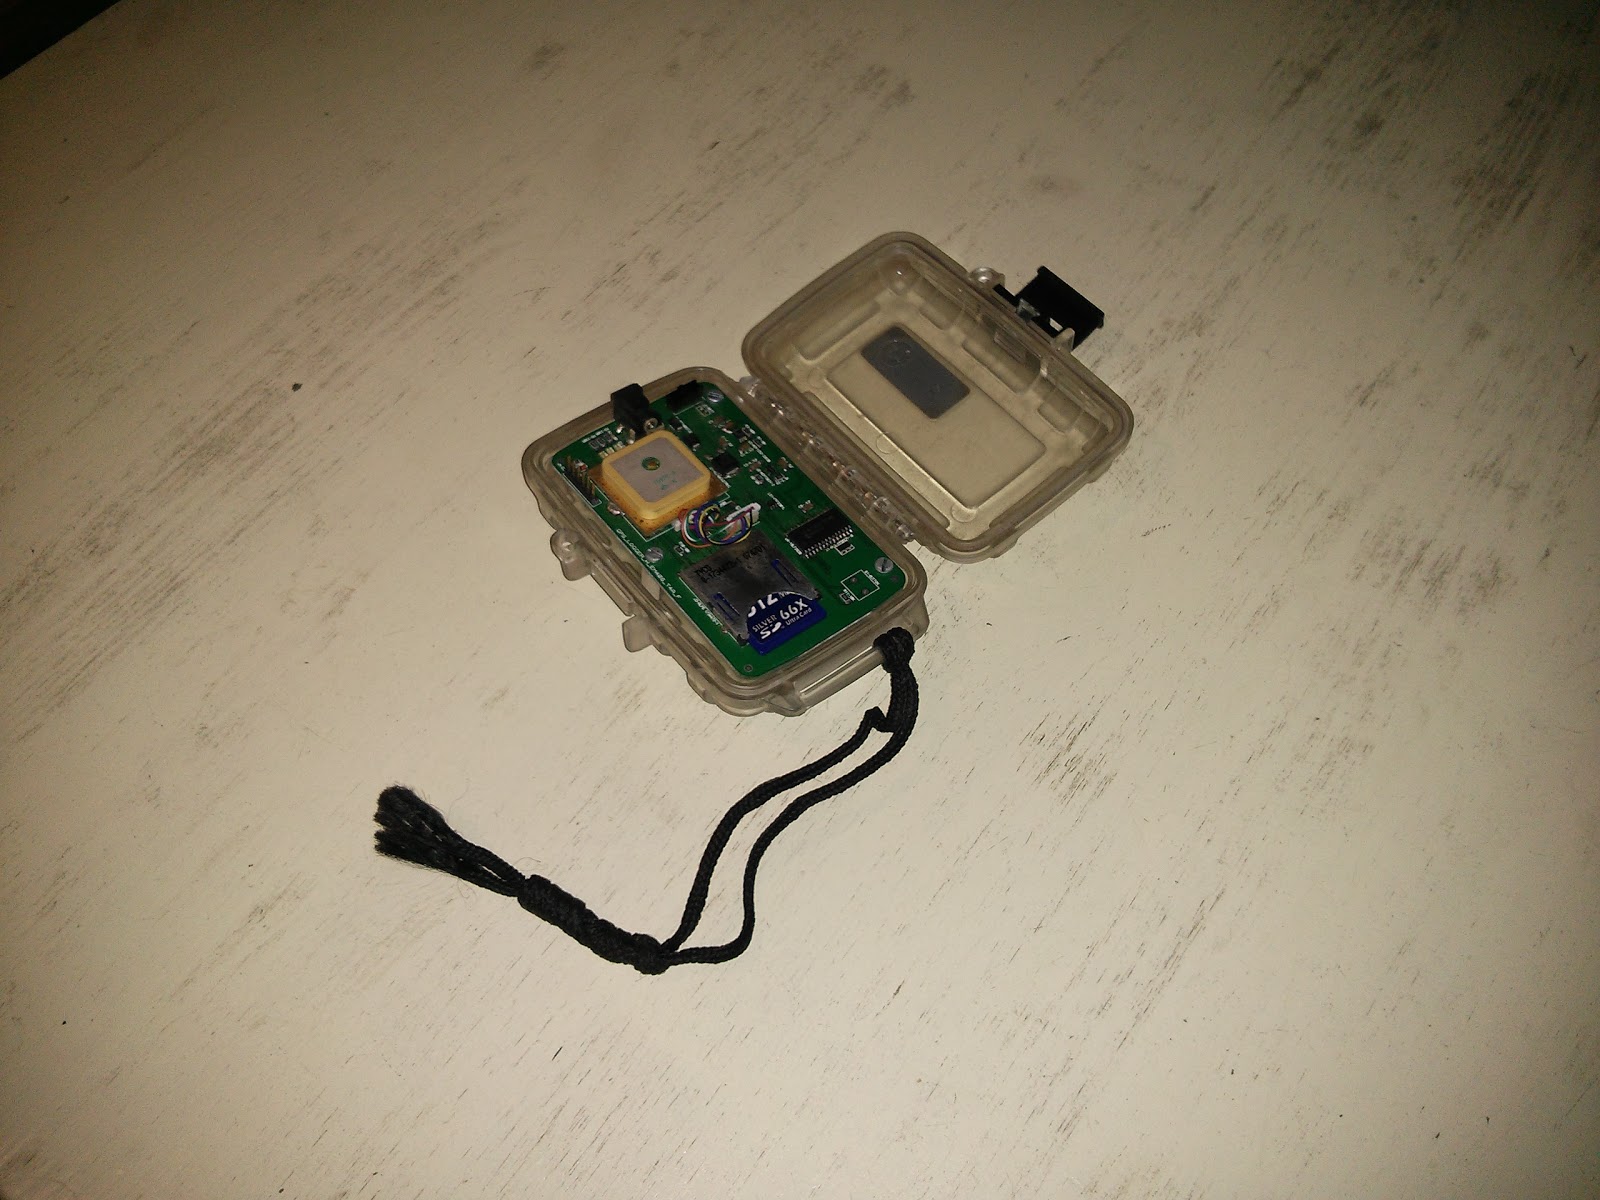
My Geo Logger in its OtterBox case.
Before I set out to hike the Israel trail I ordered the same kind of GPS logger for myself, along with the generic solar panel. This was all in the days before smartphones, don't forget. I carried it with me while walking all the way from kibbutz Dan in the north, to Tel Lachish (Where I quit my INT hike), and photographed every trail crossing along the way, for future geo tagging of points of interest. I never did anything with the data I collected. Although I checked it out once, and the trail had sampling errors all over the place..

I later got my dad (who is an electrical technician) to fix a simple female USB connector to the solar panel, and took it with me to my hike on the GR20 in Corsica. This time I had a smartphone for the geo logging, but it stopped working on the fourth day or so. Only when I got back home I found out I managed to fry its motherboard. Oopsie. Maybe it was the improvised solar panel. Maybe it was the under clocking I'd tried applying on the phone. I don't know. After I got back home I sent the panel back to my father, for another round of checks and fixes. I noticed I couldn't get it to charge my Nexus 4 at all, and I almost gave up on the idea. But then I found a website with schematics on how to make your own smartphone solar charger. I have no idea what those schematics mean, but my father does. Another round at dad's, and I now own a solar charger that might actually work. I only received it about two weeks ago, and I haven't had any serious sunny days to try it on yet, but it does send the phone into charging mode when under sun light, so I'm optimistic. Since I do not plan on geo logging my bike this time. The charger will just have to keep the phone running occasionally to contact home, and maybe check the maps and GPS applications, if I get lost. I hope it can pull this off in between town stops. If it fails, I will probably buy the SunTactics sCharger 5 instead, since I heard a lot about it on trail forums and the Facebook group.
Getting to work by bus today, so I'll try to see if it charges my phone on the way.
Update: My test failed miserably. Even though I turned off all mobile data access during my ride to work, and did not use my phone for music or internet access, I managed to lose ~2% of battery. The panel was in the sun for most of the bus ride. I guess it is not working well...

Saturday, November 23, 2013

Desert Trip Conclusion

Ok, I survived the not-so-short hike.

Our hike started after a long train ride to Be'er-Sheva, and a bus ride to Tzihur Junction (on the bus to Eilat) - a total of about 4 hours on the road. We started our actual walking at 10:15. A bit on the late side. We tried convincing the bus driver to drop us off near the trailhead, but he didn't like the idea, and dropped at at the junction, so add about 2Km of road walk to our first day.
An impressive tree, near the start of our hike
After finally reaching the trailhead we started hiking northbound on the Israel National Trail. About 3 hours of 4x4 road walking later, we finally reached the Vardit Canyon, and had a blast - At the first water hole we met a small group of 4 who got there by jeep, and they enjoyed watching us trying to get across the water in one piece.

It was possible to cross over the left canyon wall, and avoid getting wet. But we heard from a southbound hiker we've met several minutes before, that there is one water hole that required proper swimming, so we figured there's no point in trying to remain dry. I just waded in carefully, trying to walk along the outskirts of the hole, and keeping my backpack above water. Yair inflated his Neo-Air mattress, and waded across with his backpack floating on top of it. A very good idea indeed.
After crossing the first water hole, Yair is inflating his mattress for his own attempt

A short climb up some metal rings later, we met THE water hole. There was no walking around that one, with cliffs along all sides, and a metal ladder at the far end. This hole was also much deeper, and indeed required proper swimming. This time we made arrangements to use the Neo-Air for all of our gear. It took some time, but at the end we both made it to the top. We were completely wet, but the backpacks weren't, so I guess it worked. The only downside was that my hiking pants got torn pretty badly when I slipped inside the water one time.
The big water hole, getting the water bottles across using the inflatable mattress
After that hole there was some more climbing up metal rings, another ladder, and more rings to finish it up. I enjoyed this section.
Yair using his mattress to keep his backpack (mostly) dry
We were aiming at Mounta Kipah camping area, but I guess it was too far away, especially after starting as late as we did, so after thinking we were further along than we actually were, and finding out we still have about 8 more Km until we get there, and 30 minutes of sunlight, we just gave up and decided to find a place to stealth camp. Luckily, we did find a very nice spot for our tents, and went to sleep early. I think we were both out by 19:00.
My gear at camp - TarpTent Rainbow, Neo-Air, ZPacks quilt and Arc-Blast
The second day started with a short hike to Barak Canyon, this time climbing down. The trail first turned north, headed down the eastern slopes of the canyon, and reached its bottom. From there it followed it down along 3 more ladders, several sections of metal rings, and a short section of sliding along a smooth rock surface (with foot grooves) while holding a rope. It was very adventurous.
Sadly, the bit after the canyon was not as exciting. It was a long ~30Km 4x4 road walk, mostly north towards Tzofar. No major climbs up nor down. The view was pretty nice most of the time, but after several Km of walking in the sun it wasn't as exciting anymore. We bumped into several groups going south - some also doing the INT in sections, and one really large group (over 50 hikers, for sure), that passed us by when we were struggling to fit under a small rock outcrop for shade, and have lunch.
Climbing down the tallest ladder in Barak Canyon
Having a peanut butter-cheese-goat cheese-cucumber bun for lunch. I later added some pesto sauce as well
For the first time ever, we actually made a navigation error and were surprised in a positive way - we kept looking for a junction with a green trail heading east, and we didn't see it, so we thought we have at least 4 more Km util Horvat Mo'aa, and 2.5Km from there to the road. It was getting late again, and our soles hurt from all that non-stop walking, when suddenly we saw Horvat Mo'aa just a short ways off. It was a very pleasent surprise. I set there in the shade, while Yair went over to check the old Nabataeans fort.
Horvat Mo'aa near the end of our hike
From there, it was a race against time to get to the road, and from there another 1.5Km to the bus station, by 17:15, to catch our bus back home. We made it by 17:13, and the bus was several minutes late, but it was good.

In total, we did about 52.9Km in two days. I think that's a bit impressive.


View צומת ציחור לחרבת מואה in a larger map
My Gear
So, this was the first time I used my new Arc-Blast backpack, and ZPacks quilt. I carried many extra pieces of gear in the backpack, and a lot of extra food, just to try and simulate a heavier backpack I will be carrying on the PCT. With 7.5 Liters of water, and was no fun to put it on my back. But it carry it well. The outside pockets worked well for 3 extra bottles of water and the closing system worked well (I was afraid the velcro at the top will be annoying to open and close during the hike).

Some things I didn't like about the backpack, which I hope I get used to on the longer hike - I am not overly thin (an understatement), and yet I had the belt buckle tight almost all the way. I will lose some weight on the PCT, so I hope the belt will still be effective. Another small thing - my right shoulder and lower back did hurt a bit at the end. Again, I hope I'll get in better shape on the trail, and they will hold better once I get used to the daily mileage.

The quilt was very nice and comfy. At first I opened the clips and used it as a standard quilt, but it did get chilly so I closed it at night. Using the cinch cord at the top also made all the difference - without it I would definitely be a bit colder inside, but when I pulled it shut, it was very toasty indeed.

Other than that, I have to remember to get my Neo-Air not completely full - taking out a bit of air before I go to sleep will make it much more comfortable on my back. I also cooked by only boiling water in my Caldera Cone Keg, and then pouring it into the bag of my lunch. Waiting for 10 minutes - it worked like a charm. The rice was ready. I also added in mashed potato mix, and had a lot of "stuff" to eat for dinner. I didn't even finish it all. But it was tasty.

We never did try filtering water with the Sawyer Mini Filter. I carried an extra liter of dirty water with me for the entire trip (After filling it up in Vardit Canyon), but our water were enough, and we never tested the filter this time. Maybe next time.

Wednesday, November 13, 2013

Hiking in the desert

I'm going out on a two day hike in the south of Israel (a short section of the Israel National Trail), to test out my gear. I will carry some extra stuff I'm sure I won't need, like the insulating jacket and the rain jacket, but I want to test out how it feels like to carry all my PCT gear on my back. I've hiked with most of this stuff before, but the backpack is brand new, and so is the quilt I'll be using. So I hope they hold up well.

Here is a photo on what I intend to carry with me. Add to that ~6 Liters of water (for two days), and I guess some more food I still had in the fridge while taking the photo. And shoes - I forgot to put the shoes in there as well.
Well. I hope to be able to write a short trip report on Sunday, or at least post the photos. Wish me luck.

Wednesday, October 30, 2013

Buying an insulating jacket

Back in 2002 I started my AT thru-hike really early in the season (I had to catch a David Bowie concert in February 22nd in NYC, so my thru hike arranged itself around that), and I had some really cold days and nights early on. I did not carry a special down, or even synthetic, jacket. All I had was this simple EMS fleece outer layer. During the colder times I just put everything on, from polartec baselayer, to hiking clothes, fleece and rain gear on top. I was cold, but it worked.

This time around I decided I'd like to have a simple, light-weight, insulating jacket. The highs are higher on the PCT, and I expect to be camping in snow at least several times, so I should be prepared for it. Besides, it will replace the heavier fleece layer.

I checked out Outdoor Gear Lab's down jacket comparison, and marked some brands to check. At first, I was really looking into the water repellent down that was recently introduced into the market. The only company that offered such jackets was Sierra Designs, except for the Ghost Whisperer by Mountain Hardwear, which seems to be an awesome jacket. But I wanted to have the hooded option, which did not contain the treated Down. I decided I'd wait until the winter 2014 season options be available, hoping that the treated down will appear in more options and more brands.

About a month ago I noticed that Mountain Hardwear have finally renewed their offerings, and are not selling a Hooded Ghost Whisperer with Q Shield Down (Their brand name for water repellent down). I was really looking into buying it, trying to figure out the best way to have it shipped to Israel without paying too much. The web site did not ship outside of the US, but REI and Backcountry Gear did, for about $50 more. I was also looking into a delivery company that gives you an address in the US, and then ships the stuff to Israel itself. I used it once to buy a pair of New Balance shoes. Their rates were $30 for the lightest package, and up. And they were also going through customs and VAT when bringing the package over, so there's no point in hoping it will slip under the radar.

After many evenings trying to decide which jacket I should purchase, and how should I get it over here, I finally decided on a synthetic one. I know down is lighter and compresses better, but I figured that since I got the down quilt, I can spare some poor geese their feathers, and manage with a heavier option after all. I did buy a rather light Thermostatic Hooded Jacket from Mountain Hardwear, so I'm not complaining much. The weight difference is 306g (on my home scales) to 212g (the Hooded Ghost Whisperer, according to their site's specs), so it's about 100g difference. And it's also about $70 cheaper, which is another little perk.

About the shipping, I made the mistake of using the delivery company, hoping the light weight jacket will be only $30, but at the end the bulk of the package caused it to be $50, and then I had to pay another $50 for the VAT in Israel. So next time I'll just order directly from Backcountry Gear. Lesson learned.

Wednesday, October 16, 2013

The big three

It wasn't easy deciding which backpack/sleeping bag/shelter I'd like to carry on my hike. I made many comparisons between different manufacturers and tried to pick out the best gear I can afford.

Backpack:
I have a Gossamer Gear Mariposa Plus backpack, from around 2008. Mine looks a bit different than the current model, both in shape (The closure system) and in materials (Mine is made out of SilNylon, and not this tougher dyneema fabric). I initially bought it before heading out to hike the Israel National Trail, and I highly recommend it.

It can really handle above average loads, for an aspiring (but-not-quite-there-yet) ultra-light hiker such as me. On my INT hike I think I had a rather light total pack weight, cutting down to carry only essentials, and carrying a Rainbow Tarptent. But since then, I went out to several shorter hikes in the desert, where I had to carry up to 8 Liters of water on my back. Picking up the backpack when it was fully loaded was no fun, but it held.
ZPacks "Arc Blast" Ultralight Backpack

I figured that after 5 years, it's time for me to find a new backpack, and I was contemplating just ordering the newer Mariposa model, or maybe a Gorilla, but during my recent hike on the Tour du Mont Blanc, with my old backpack, I noticed that I sweat a lot along my back, even when the weather itself was not exceptionally hot. I recalled reading about the ZPacks Arc Blast, with its outer frame that enables ventilation along the back, and figured I should look into it.

Back in Israel I found a hiker who owned an Arc Blast, and I drove over to have a look at it. I was very impressed. It seemed strong and roomy. I was almost hooked on the idea of ordering it. I just needed to finally do it, to mark the beginning of my PCT gear purchasing season.

Sleeping Bag:
Now, the sleeping bag is another story - Back on the AT I used some unheard-of sleeping bag brand I bought in Israel, and it worked, I guess. There was nothing ultra-light about it, but it was a decent 20 degrees synthetic bag (-7c), and I managed to carry it (almost) all the way to Katahdin (At some point I used a fleece blanket instead, and just shipped the bag ahead towards the White Mountains, but that's a different story).

Ever since, I kept on using it for short weekend trips in Israel, also carrying it on my two week walk along the Camino de Santiago, for no real reason (You can easily get by there with a thin sleeping bag liner instead). But I knew I'd have to find something more serious for my next big hike.

The opportunity came in 2011, when I was planning my hike on the GR20, in Corsica. I knew the time has came for me to buy a new sleeping bag, that would be especially light for the upcoming hard trail. Just then GoLite had one of their sales, and I managed to buy their Ultra-Light 3 Seasons Quilt at almost half price, for $160 dollars. Back then it was rated as a 20 degrees bag, though now they sell a similar quilt and rate it for 30. Anyway, it was a great price for a good and light bag that many people have used on hikes along the PCT and CDT. It was a pain getting it here, though - I had to use relatives in Florida to actually make the order, have them send it over to other relatives in NYC, whose parents visited them, and carried the bag to back to Israel for me. A royal pain in the ass. The pain in the ass being me, mostly.

The quilt served me well in Corsica. But sadly, one year later I lent it to someone who came in for advice on the GR20. I lent him a lot of gear - my backpack, tarptent, trekking poles and mattress as well. But he managed to get just my quilt stolen. He was in quite a fix there, in a rain storm on the mountains of Corsica, finding out he has no quilt in his backpack. But he managed to finish his hike. I got stuck without a decent sleeping bag again.

So now I was on the lookout for a new sleeping bag/quilt. Golite didn't have their sales when I was looking around lately, and I was trying to decide mainly between them, Katabatic Gear, enLIGHTened Equipment and ZPacks. Trying to compare price, weight and degrees rating is hard. Especially when the most expensive bags are the best, naturally. I was mostly looking out for hydrophobic down, which is a rather new thing from the past two years or so, which protect the down from losing all its loft when wet, and effectively reduces the main reason to prefer synthetic bags over it.

So that eliminated GoLite (They just now released a hooded jacket with a water repellent down, so I bet next season more of their product will use it).
ZPacks 20 Degree 850 Fill Power Down Sleeping Bags
I've heard many good things on Katabatic Gear, and also enLIGHTened Equipment are well known for their high quality quilts, and much more reasonably prices quilts, but at the end I decided I will go and add the ZPacks 20 Degree 850 Fill Power Down Sleeping Bag to the already-decided-upon Arc Blast, and just went ahead and ordered them together straight from the site. Shipping to Israel was also a factor, and I think ZPacks had the cheapest shipping cost for me.

Shelter:
I was thinking about replacing my old Rainbow (which weighs around 1Kg) with a shelter that weighs almost half of it. I used the excellent SUL/XUL Solo Fully Enclosed Shelter Comparisons table maintened by HikeLighter.com, and tried to figure out for myself how much less comfortable I'm willing to be (I've never slept under a tarp) in order to shave off some grams. My mind was almost set on some kind of Hexamid Solo combination with a beak, or maybe even the Skyscape X, but at the end I couldn't justify such a crazy expense, and I decided to stick with my current tent for now.